6. Put Your Project on GitHub
You will synchronize a practice project and reproduce it from a second checkout. Start with the two local commits from Chapter 5, a working toolchain, and a GitHub account you control. The repository can remain private. By the end you will have evidence that the intended remote contains your history and that another checkout can follow the written build path.
A successful local build answers an important question: the current source works with the current installed tools. It leaves another question open: did you preserve all the files and instructions required to repeat it? Pushing and cloning help expose missing tracked files and undocumented assumptions. The exercise is deliberately small so that a failure teaches you about reproduction rather than a sprawling deployment system.
1. Choose identity and visibility deliberately
Sign into GitHub in your browser and verify the account you intend to use for the practice repository. Do this before creating a repository or copying a remote URL. A browser can be signed into one account while Git's credential helper uses another. The account visible on a web page is useful information, but a successful Git operation is a separate authentication check.
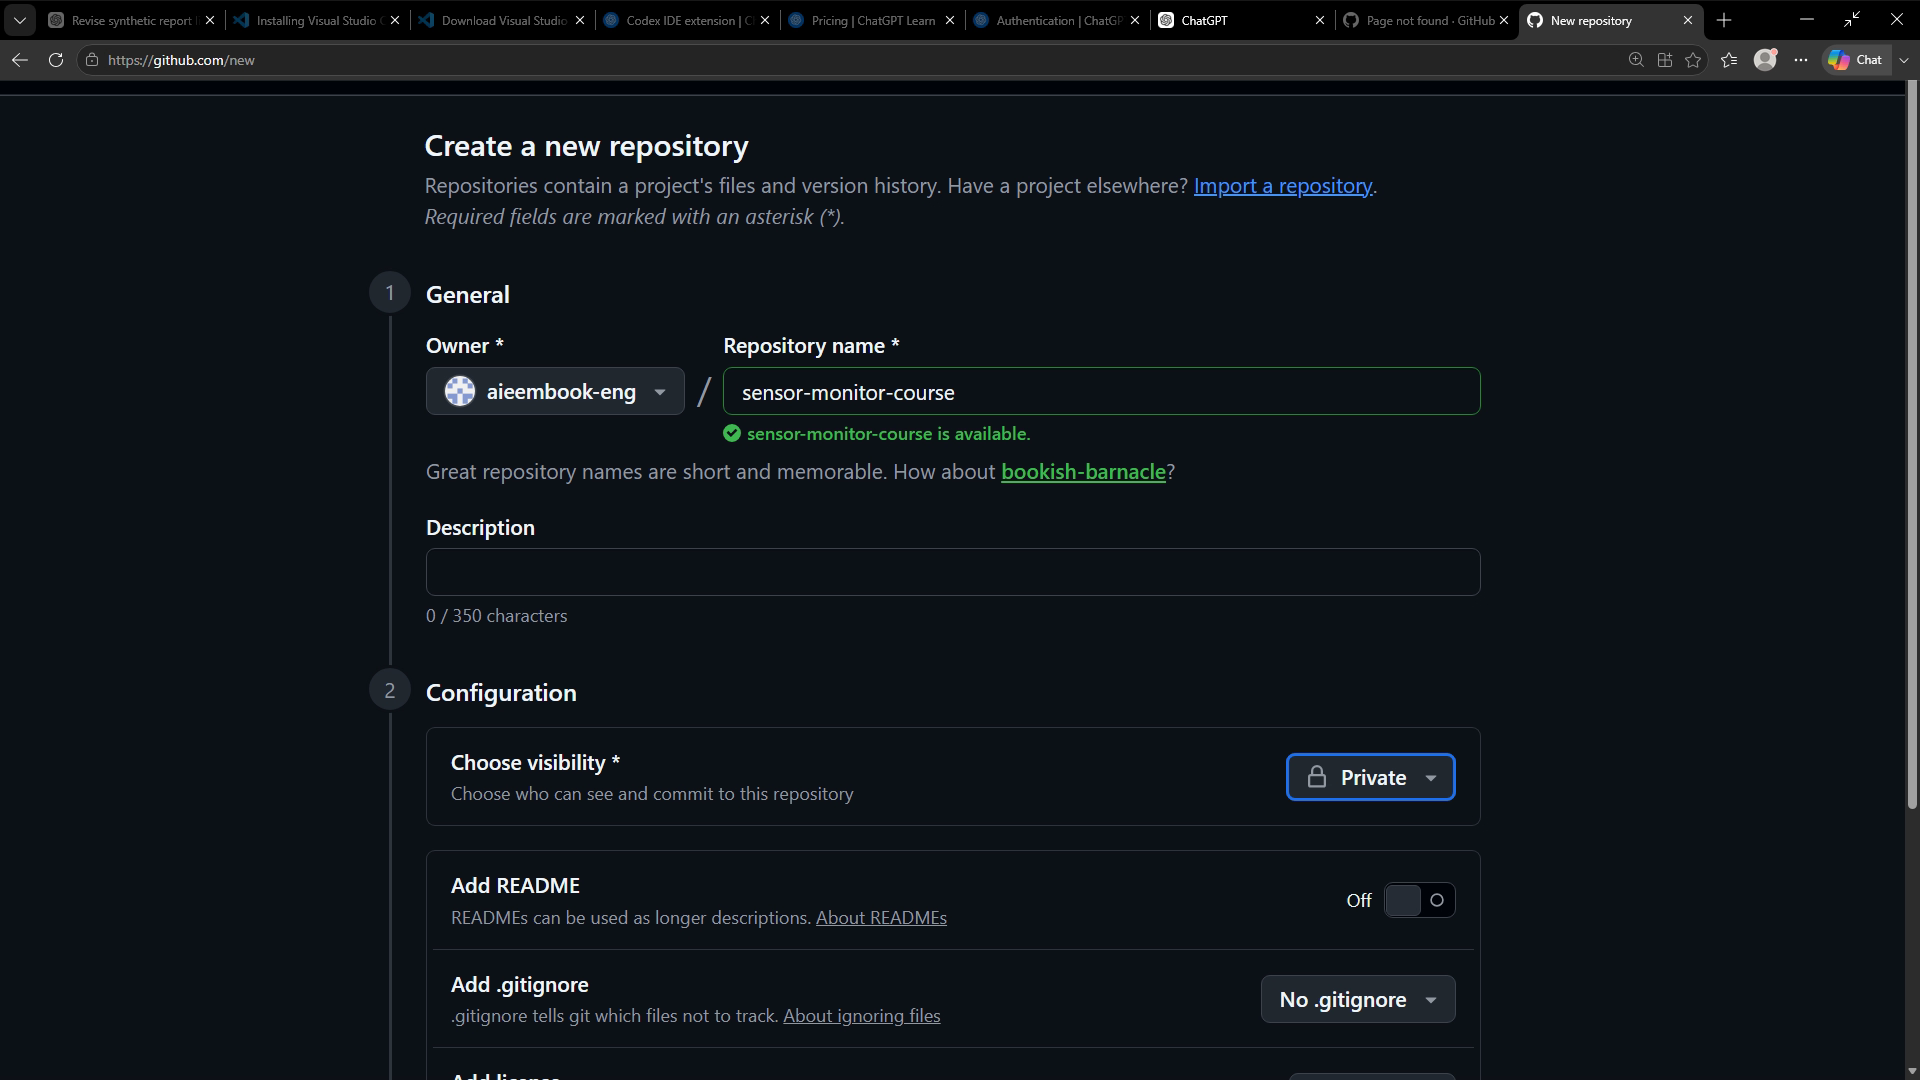
Create a private practice repository with a neutral name such as sensor-monitor-practice. Private visibility satisfies this lesson; public sharing is not required. Inspect the selected owner and visibility before creation. The hosted service's Hello World guide explains repositories, branches, commits, and pull requests; our exercise adds reproduction checks to that introductory workflow. GitHub Hello World
Because you already have local history, create the remote without an initial README, license, or ignore file. The README and ignore file already exist in your CP01 project; licensing is a separate decision, and CP01 does not supply a license file. Creating any separate initial commit on the server introduces a second history to reconcile. If you accidentally initialize the remote, do not force-push over it; inspect both histories and choose a deliberate recovery.
Before the first push, inspect the actual tracked files and recent commits. A private repository still receives what you upload. The exercise includes source, scripts, fixtures, and documentation, not credentials or unrelated project history. Git can preserve deleted content in earlier commits, so reviewing only the current file tree is insufficient if you introduced a sensitive file earlier. Use an appropriate clean practice history from the supplied materials.
Figure SS06-01 shows the intended private repository before creation. The captured lesson uses book-only identity and content. Your account need not resemble that identity; it needs to be the one you knowingly selected. Do not reuse the author's remote URL as your exercise destination.
2. Connect the correct remote
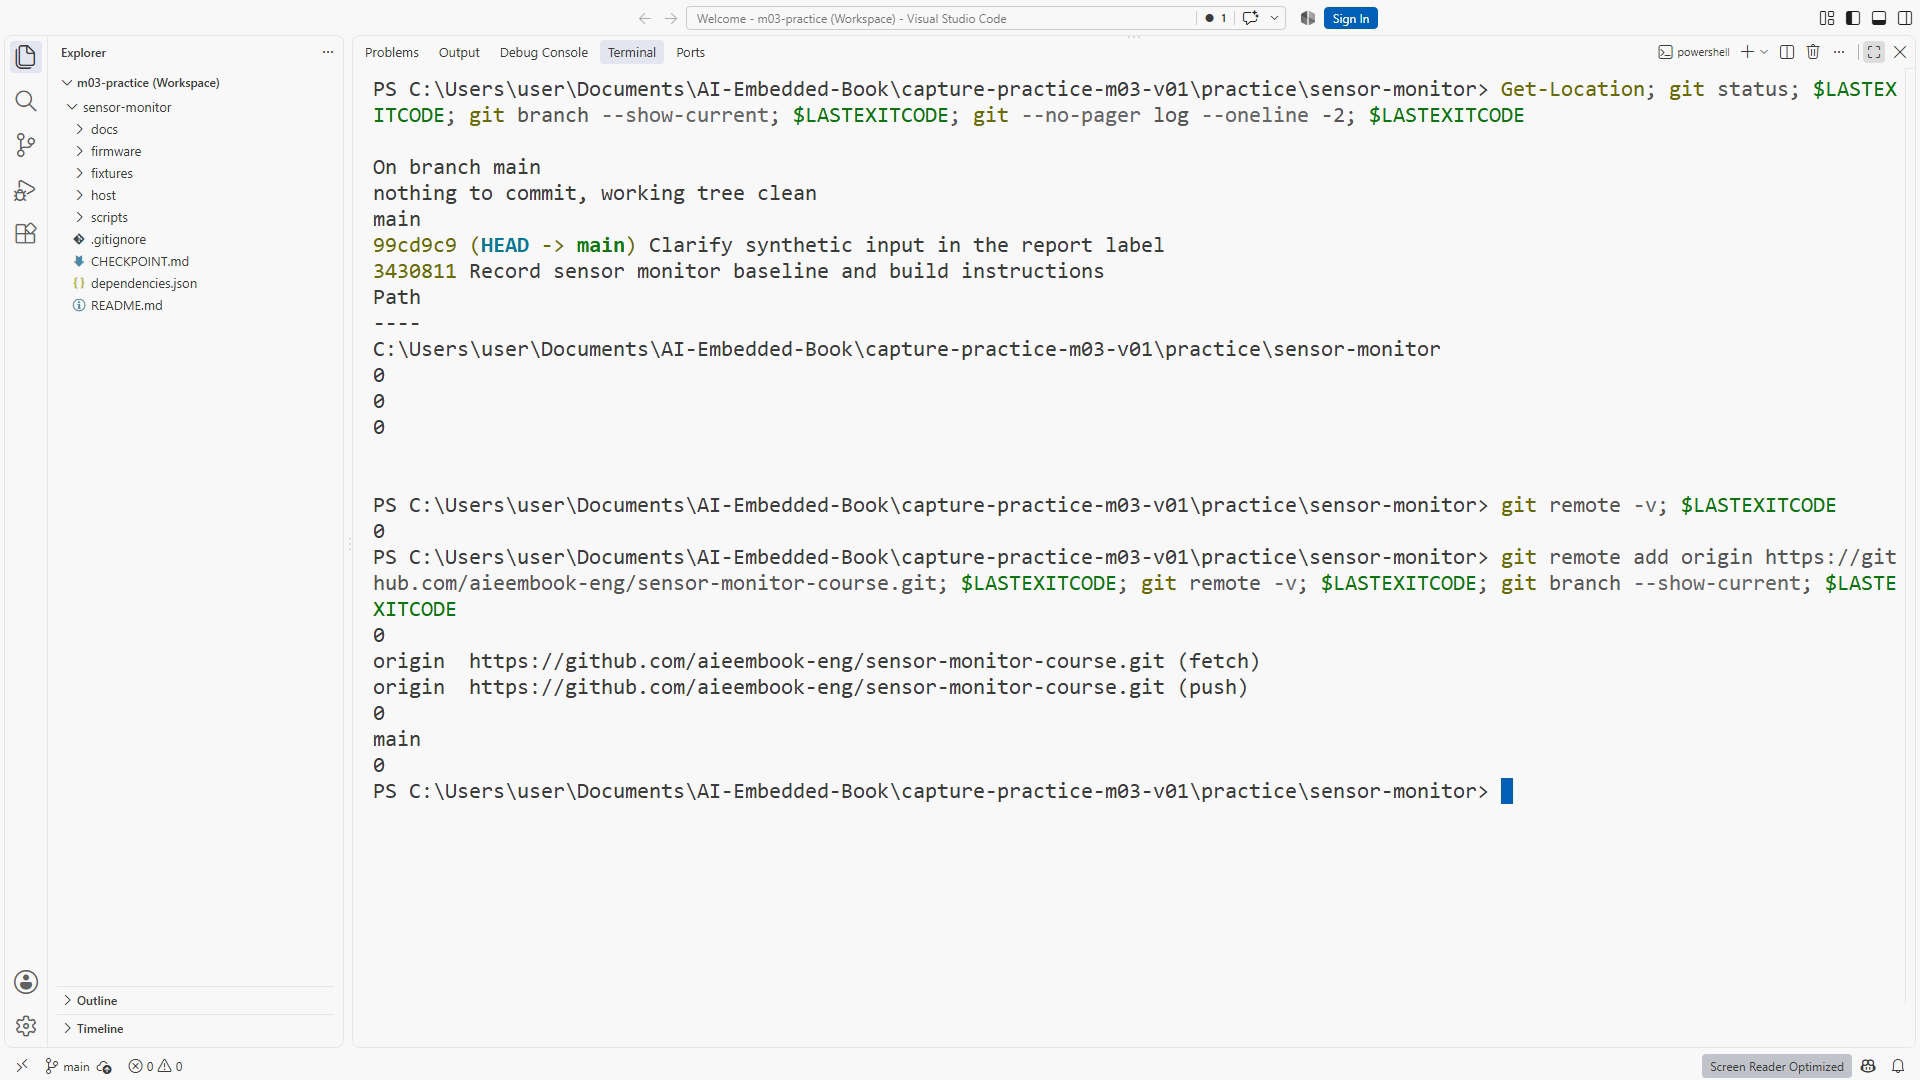
A remote is a named repository location stored in local Git configuration. origin is a conventional name, not a guarantee that the address is right. Inspect it explicitly. From PowerShell in the Chapter 5 practice root:
# Context: PowerShell in sensor-monitor-git, containing the two local commits.
git status
git branch --show-current
git remote -v
If no remote exists, copy the HTTPS URL from your newly created private repository and add it. Substitute your real account and repository name; the following address is a template, not an executable destination:
# Context: same repository; replace YOUR-ACCOUNT with your selected owner.
git remote add origin https://github.com/YOUR-ACCOUNT/sensor-monitor-practice.git
git remote -v
Read the result before pushing. Check owner, repository, and transport. If origin already exists, adding it again will fail rather than fix its value. Inspect the existing URL and, only after identifying it as wrong, set the correct URL with git remote set-url origin followed by the copied address. Record what you corrected. git remote reference
Do not put a token in a remote URL. A URL can appear in command output, shell history, logs, and screenshots. Use the supported credential flow instead. Figure SS06-02 shows the demonstration remote and branch after inspection, with no secret material. A correct-looking URL is a configuration observation; the next transport operation establishes whether access actually works.
3. Authenticate without confusing it with commit identity
Your Chapter 5 user.name and user.email settings describe commit authorship. They do not grant access to a private repository. HTTPS Git authentication uses a credential mechanism supported by the host and installed client. GitHub documents Git Credential Manager as one supported way to manage HTTPS authentication. Caching GitHub credentials
When the client requests sign-in, complete the private browser flow and return to the terminal. Do not paste an account password or recovery code into a project file. The recorded lesson omits credential entry and shows the successful post-authentication operation. If a login challenge requires your action, complete it yourself; it is not a reason to manufacture a success result.
Authentication failure and repository-not-found messages need context. The URL might be wrong, the credential might belong to a different account, or the account might lack access. Verify the repository in the browser and configured remote first. Then use the supported credential-manager flow to correct the identity. Repeatedly retrying a push does not fix a wrong owner string.
4. Push, fetch, and pull have different jobs
Push sends local commits and requests a remote reference update. Fetch retrieves remote objects and updates local knowledge of remote references without integrating them into your current working branch. Pull combines fetching with integration according to its options and configuration. In this lesson, --ff-only allows a pull only when the branch can advance without creating a merge commit. git push, git fetch, git pull
From the correct practice repository, after reviewing its clean state:
# Context: PowerShell in the reviewed local practice repository.
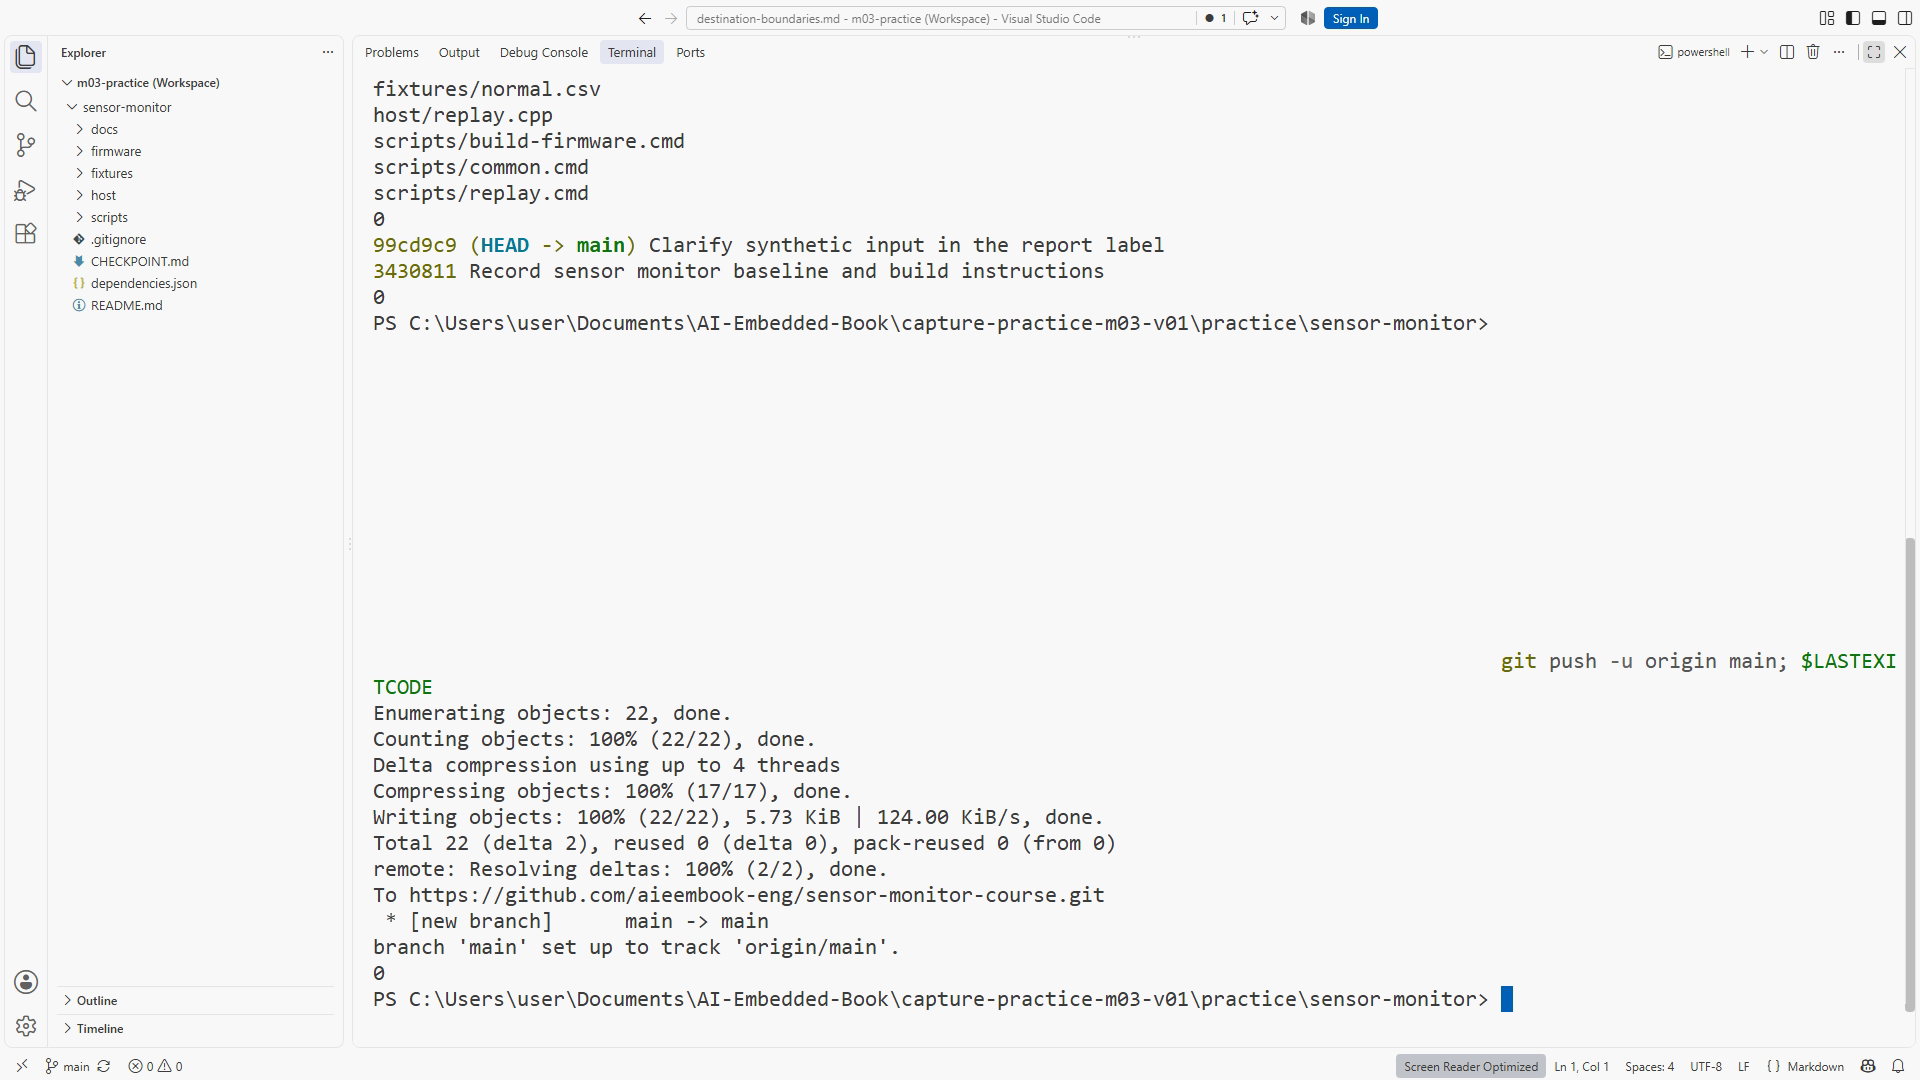
git push -u origin main
git fetch origin
git status
git log --oneline --decorate -3
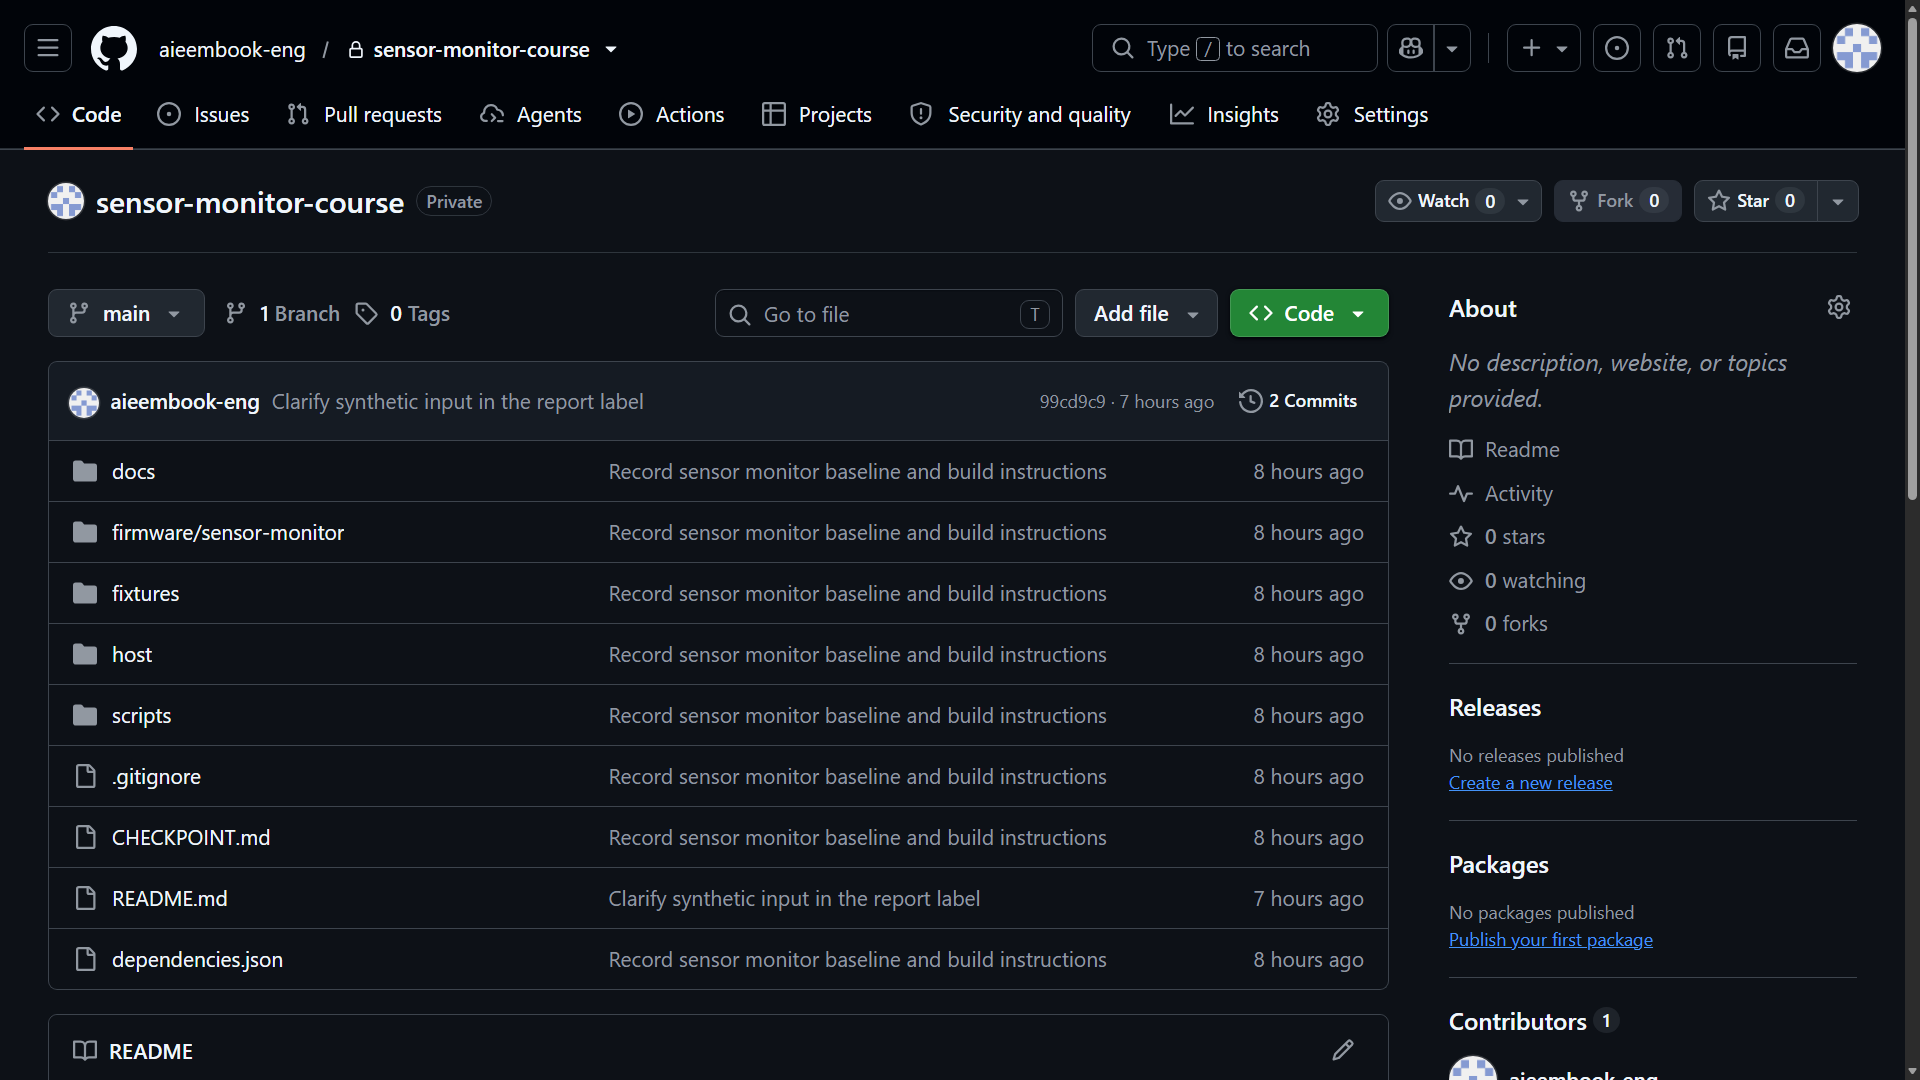
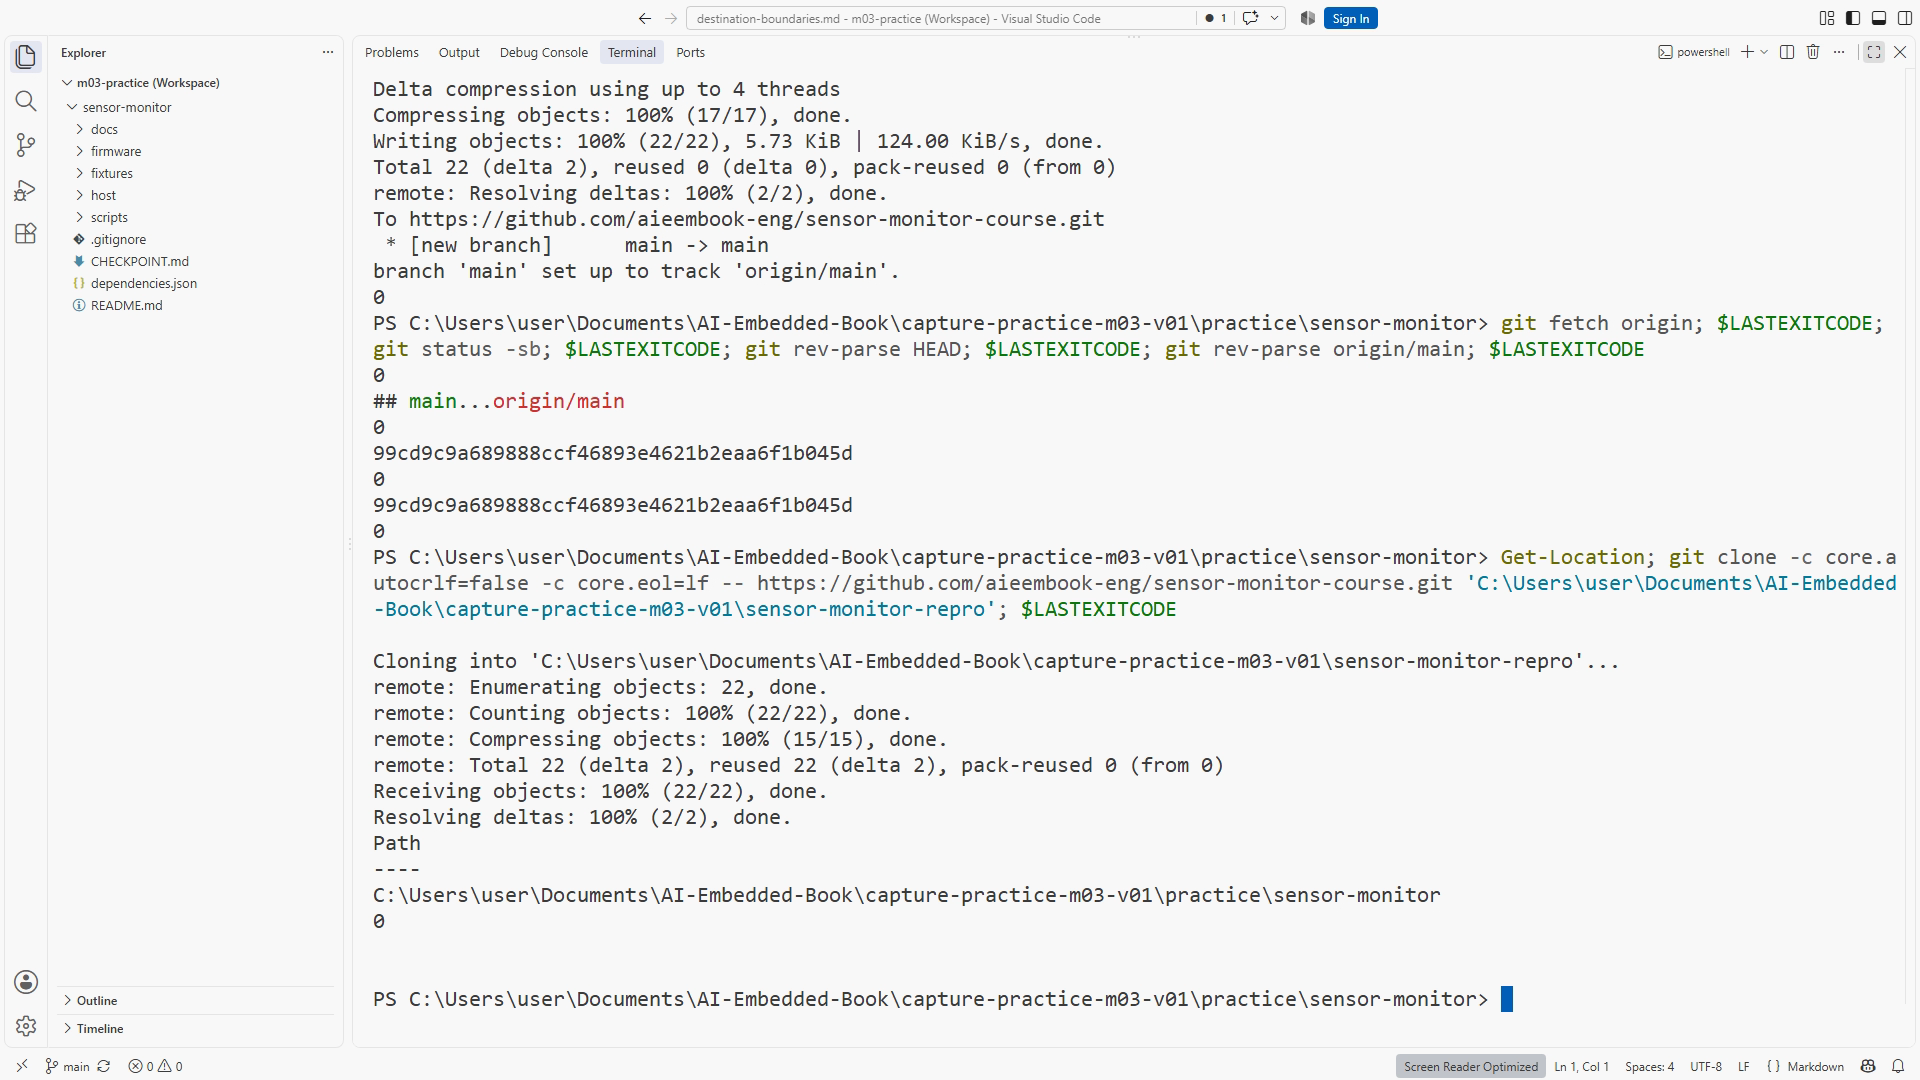
The -u option records an upstream relationship for the pushed branch. Inspect the actual output for success and the named remote branch. A nonzero error is not a partial success to ignore. Figure SS06-03 records the initial push and tracking result; SS06-04 shows the expected files and latest teaching commit on GitHub.
Open the repository in the browser and inspect the README, source, and history. Compare the latest commit identifier with your local git rev-parse HEAD result. This cross-check catches an easy mistake: looking at the wrong repository tab while assuming a successful push updated it. It also helps distinguish a stale page from a transport problem.
Figure D06 shows a local repository and a remote with separate arrows for push, fetch, and clone. Fetching is valuable even when you do not immediately integrate changes, because it lets you examine what exists before choosing an action. We use that habit when recovering from a remote-ahead state.
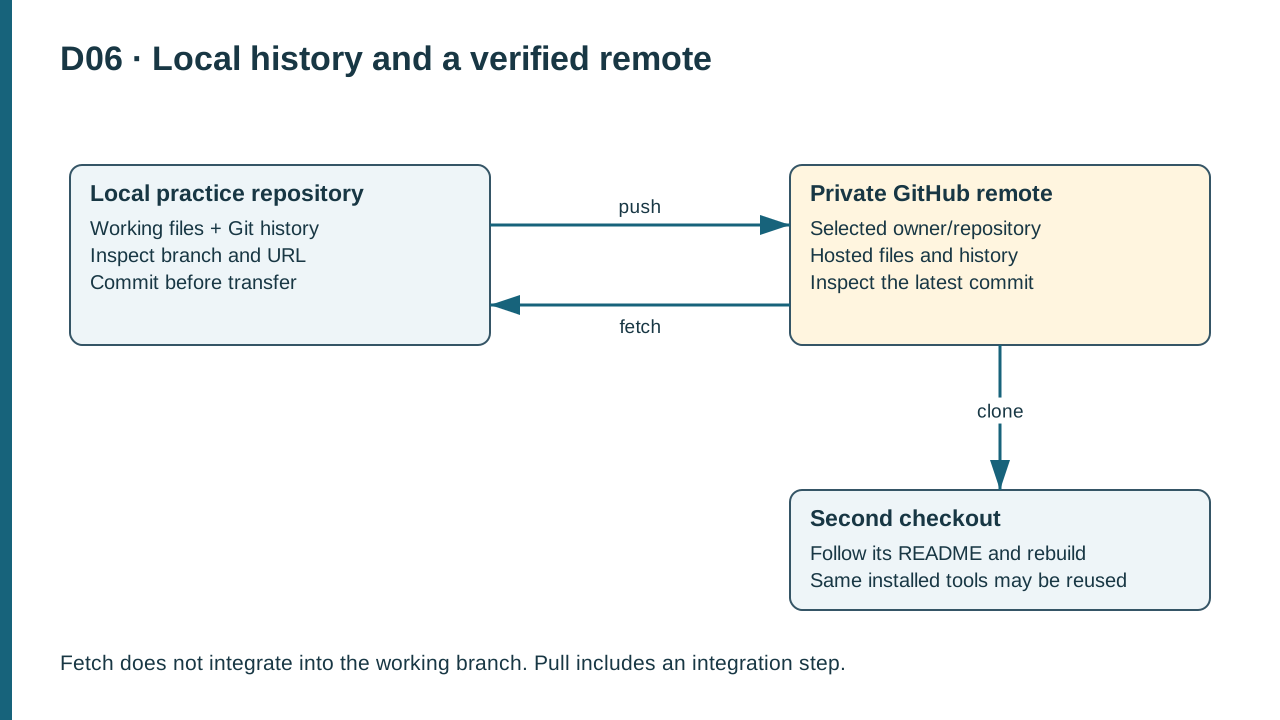
D06. Push sends commits to the remote; fetch retrieves remote knowledge without integration; clone creates a separate checkout for reproduction.
5. Worked example: reproduce from another folder
Close terminals that might tempt you to keep using the first checkout. Open PowerShell in the parent learning folder, such as C:\BookLab. Clone the private repository to a deliberately new name:
# Context: PowerShell in C:\BookLab, outside the original repository.
git clone https://github.com/YOUR-ACCOUNT/sensor-monitor-practice.git sensor-monitor-repro
Set-Location .\sensor-monitor-repro
Get-Location
git status
git rev-parse HEAD
Replace the URL with the already verified practice URL. Git creates the destination folder and checks out the default branch. If the destination exists and contains work, choose a new empty path rather than delete it. Figure SS06-05 shows the new checkout path and completed clone. git clone reference
Follow only the new checkout's README and dependency record. Run the baseline checks from that root:
# Context: PowerShell in the newly cloned sensor-monitor-repro root.
.\scripts\replay.cmd
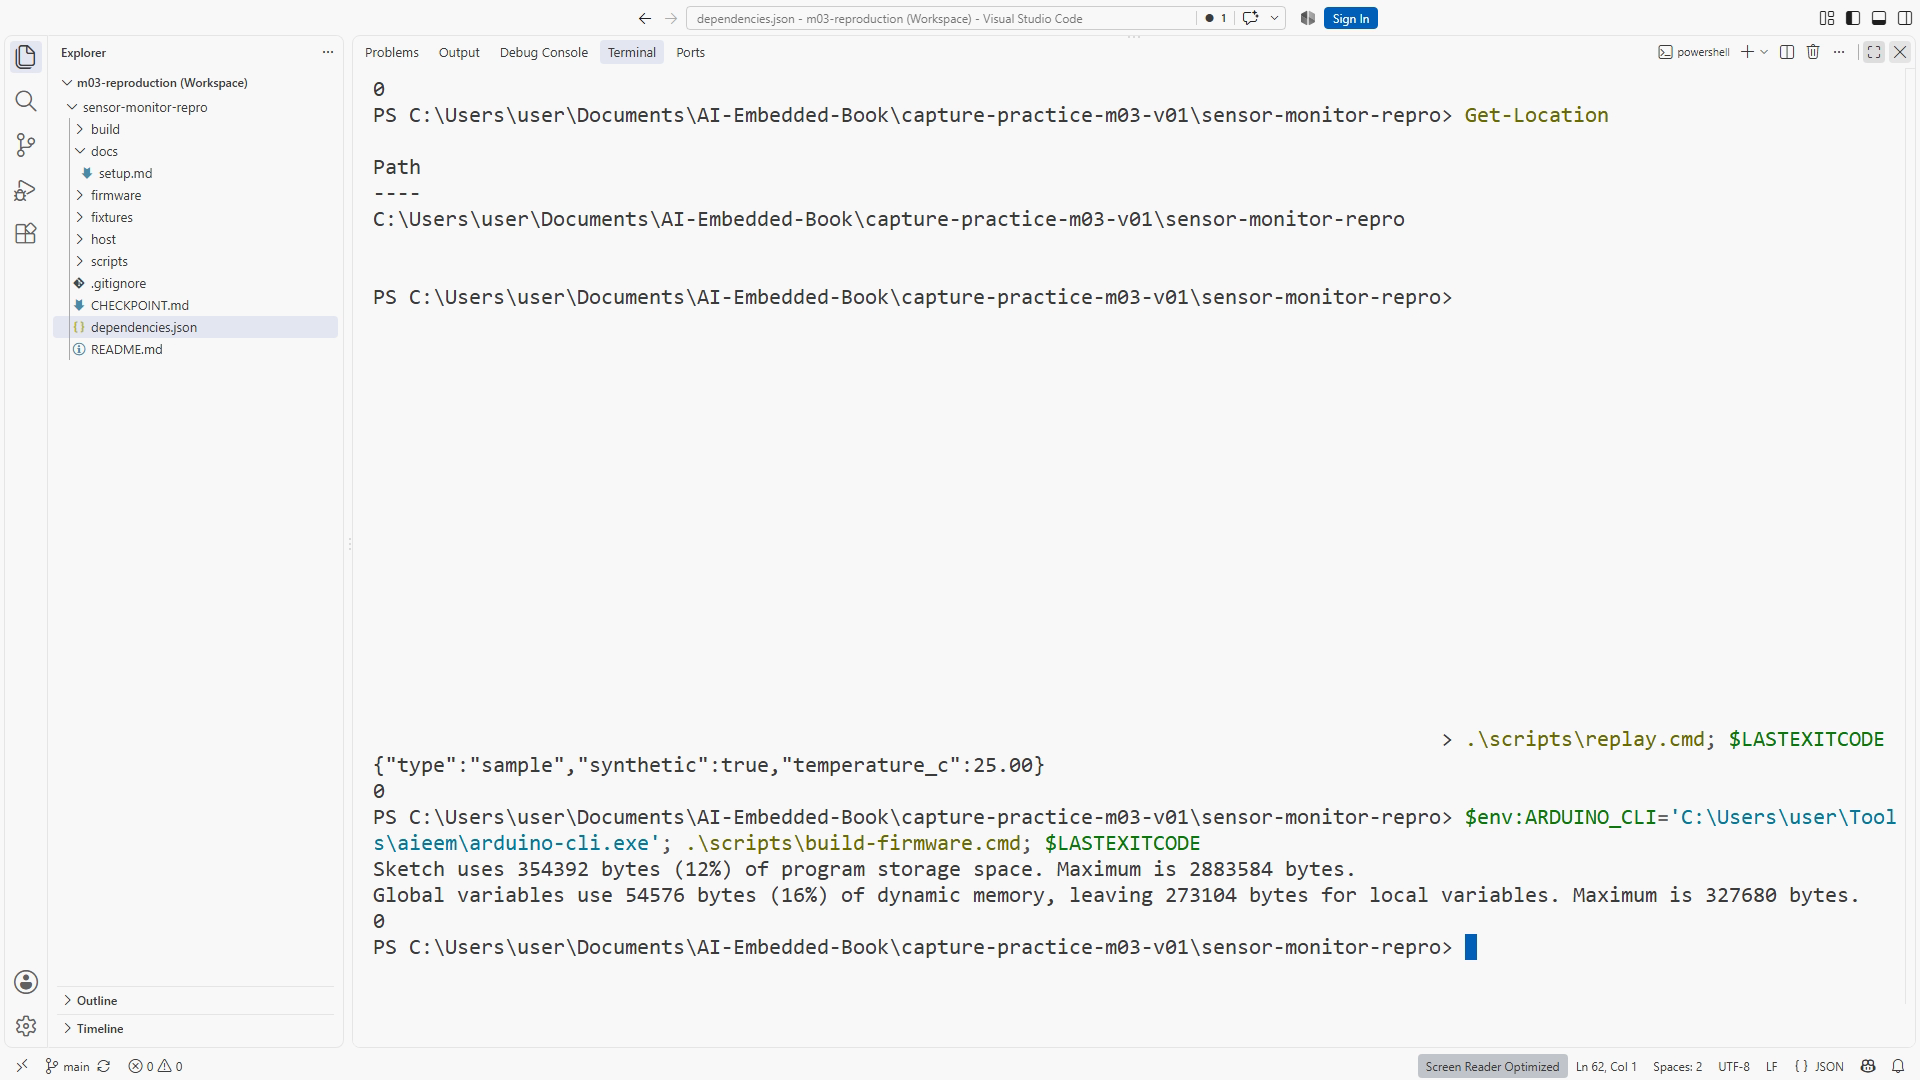
.\scripts\build-firmware.cmd
Run each command separately, capture the result, and label the replay synthetic. The same installed toolchain may be reused; a second checkout is not a fresh operating-system installation. This check tests whether tracked files and written instructions are sufficient in the recorded environment. It does not prove the setup works on every machine or from an empty dependency cache.
A useful reproduction record includes date, cloned URL without credentials, commit, destination, tool versions, commands, exit results, and limitations. If a build succeeds only after copying an untracked header from the original folder, the reproduction test has found an omission. Add the necessary source to the intended project, explain it, and repeat the affected clone/build check after synchronizing.
Figure SS06-06 shows the real second-checkout build when captured. The authentication and clone checks in the edition's earlier readiness rehearsal established transport for a bounded setup repository; they were not the complete project reproduction exercise. Keep those scopes distinct when reporting your own result.
6. Lab LAB06: synchronize and rebuild independently
Create or use your private practice repository, verify its remote, push the two meaningful commits, and clone into a new folder. Before building, write down which checkout you are in and its commit. Follow the README without referring to unsaved notes in the original editor session. Save actual CP01 fixed-sample replay and cross-build results. Automated assertions are introduced at CP07; do not invent them at this checkpoint.
The expected observations are matching intended history, a clean initial second checkout, and successful documented checks. Hashes, elapsed time, paths, and compiled size can differ from another learner's run because environment and metadata differ. Explain meaningful differences rather than demanding that every character match a screenshot.
If the README omits a prerequisite, record the failure and improve the instruction in a small new commit. Then synchronize and retry the affected check from a clean source state. A reproduction test that reveals a missing step is doing useful work. The lab is complete when you can follow the corrected path and explain its evidence limits.
For an extra inspection, compare git ls-files in the original and cloned folders. This lists tracked paths, which helps distinguish source omitted from history from a toolchain dependency installed outside it. Do not solve a missing dependency by committing arbitrary installed programs. Record how the supported dependency is obtained and which version was tested.
7. Failure and recovery: the remote is ahead
Git may reject a push when the requested update would discard remote work. First preserve local changes and inspect state. In this beginner workflow, start from a clean working tree, then fetch and compare:
# Context: PowerShell in the local practice repository; inspect before integrating.
git status
git fetch origin
git log --oneline --graph --decorate --all -8
If your branch has no unique commits and can simply advance, use git pull --ff-only. If local and remote branches both contain unique commits, the command should stop rather than invent an integration choice for you. Read the changed files and use the review/merge lesson next. GitHub's non-fast-forward guidance explains why preserving remote history matters. Non-fast-forward errors
Do not use force-push as a generic repair. It changes the question from “how do I incorporate existing work?” to “may I replace the remote reference despite its current history?” That is not this lesson's objective. If you created the remote with an unrelated initial commit, one option for a disposable exercise is another empty private practice repository with a new name, preserving the first until you resolve what it contains.
For a wrong remote, inspect and correct the URL before any further push. For authentication failure, correct the private credential flow. For a build failure after clone, compare tracked source and documented dependencies. These failures may appear during the same session, but they require different remedies.
8. Why a pull request exists
A pull request is a place to propose and discuss integrating changes between branches. It gathers a description, diff, comments, and related checks. It is not proof that code is good, and opening one does not require public visibility. In the next chapter you will use a branch and review a bounded agent change before integration.
Write a useful description around behavior: “The README now says synthetic input explicitly. The fixed sample and firmware are unchanged. Reviewed the wording and ran the applicable CP01 replay.” Include only results that occurred. If checks are pending, say so. A reviewer should be able to decide what to inspect without reading your entire conversation with an assistant.
Completion checklist
- I chose the intended account and private visibility deliberately.
- I inspected the remote before pushing and verified hosted history afterward.
- I cloned into a distinct folder and recorded the actual commit and location.
- I reproduced the documented checks and stated their environment limits.
- I can distinguish authentication, history, path, and build failures.
Review questions with answers
1. Does fetch change my working source? Fetch updates local knowledge of the remote without integrating its changes into the current working branch. Inspect that knowledge before choosing a merge or fast-forward action.
2. Why build from a second checkout on the same computer? It can reveal missing tracked files and dependence on the first folder's leftovers. It does not prove a completely fresh machine setup, so record that limitation.
3. Why avoid force-push when the remote is ahead? The remote may contain work you have not incorporated. Fetching and reviewing preserves your ability to integrate it deliberately instead of replacing its reference blindly.
Transfer exercise
Choose a project you could keep private. Write a three-step reproduction check naming the commit, dependency record, and success evidence. Identify one assumption a same-machine clone would leave untested. That distinction will make your future release notes more useful.