M02-L03 — Read your first Git diff
Outcome: Explain the exact changed lines before staging or committing them.
Start: M02-L02; CP01 source-only practice folder and its baseline commit.
A diff compares versions. In this lesson, ordinary git diff compares working changes against staging. The cached view compares the staged snapshot against the current commit. A minus line shows previous content; a plus line shows new content. Those markers belong to the display, not the source file. git diff
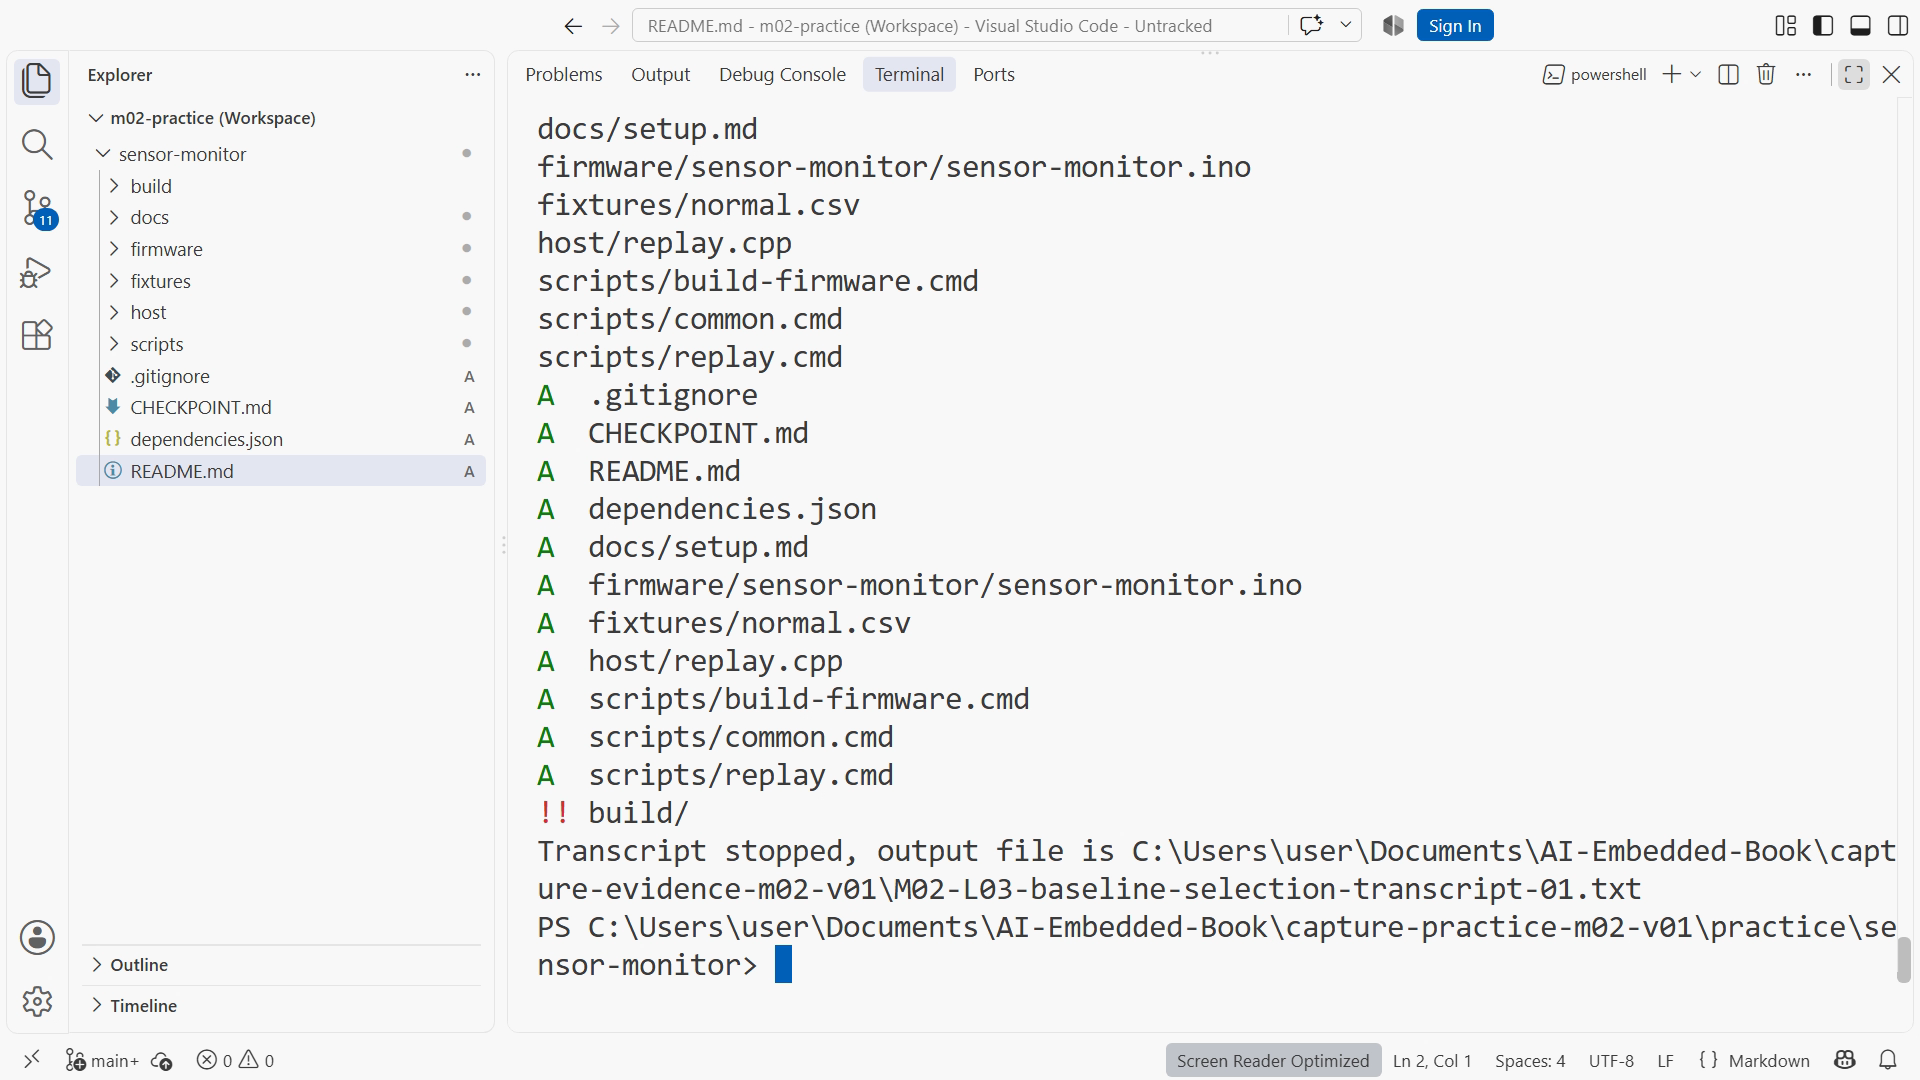
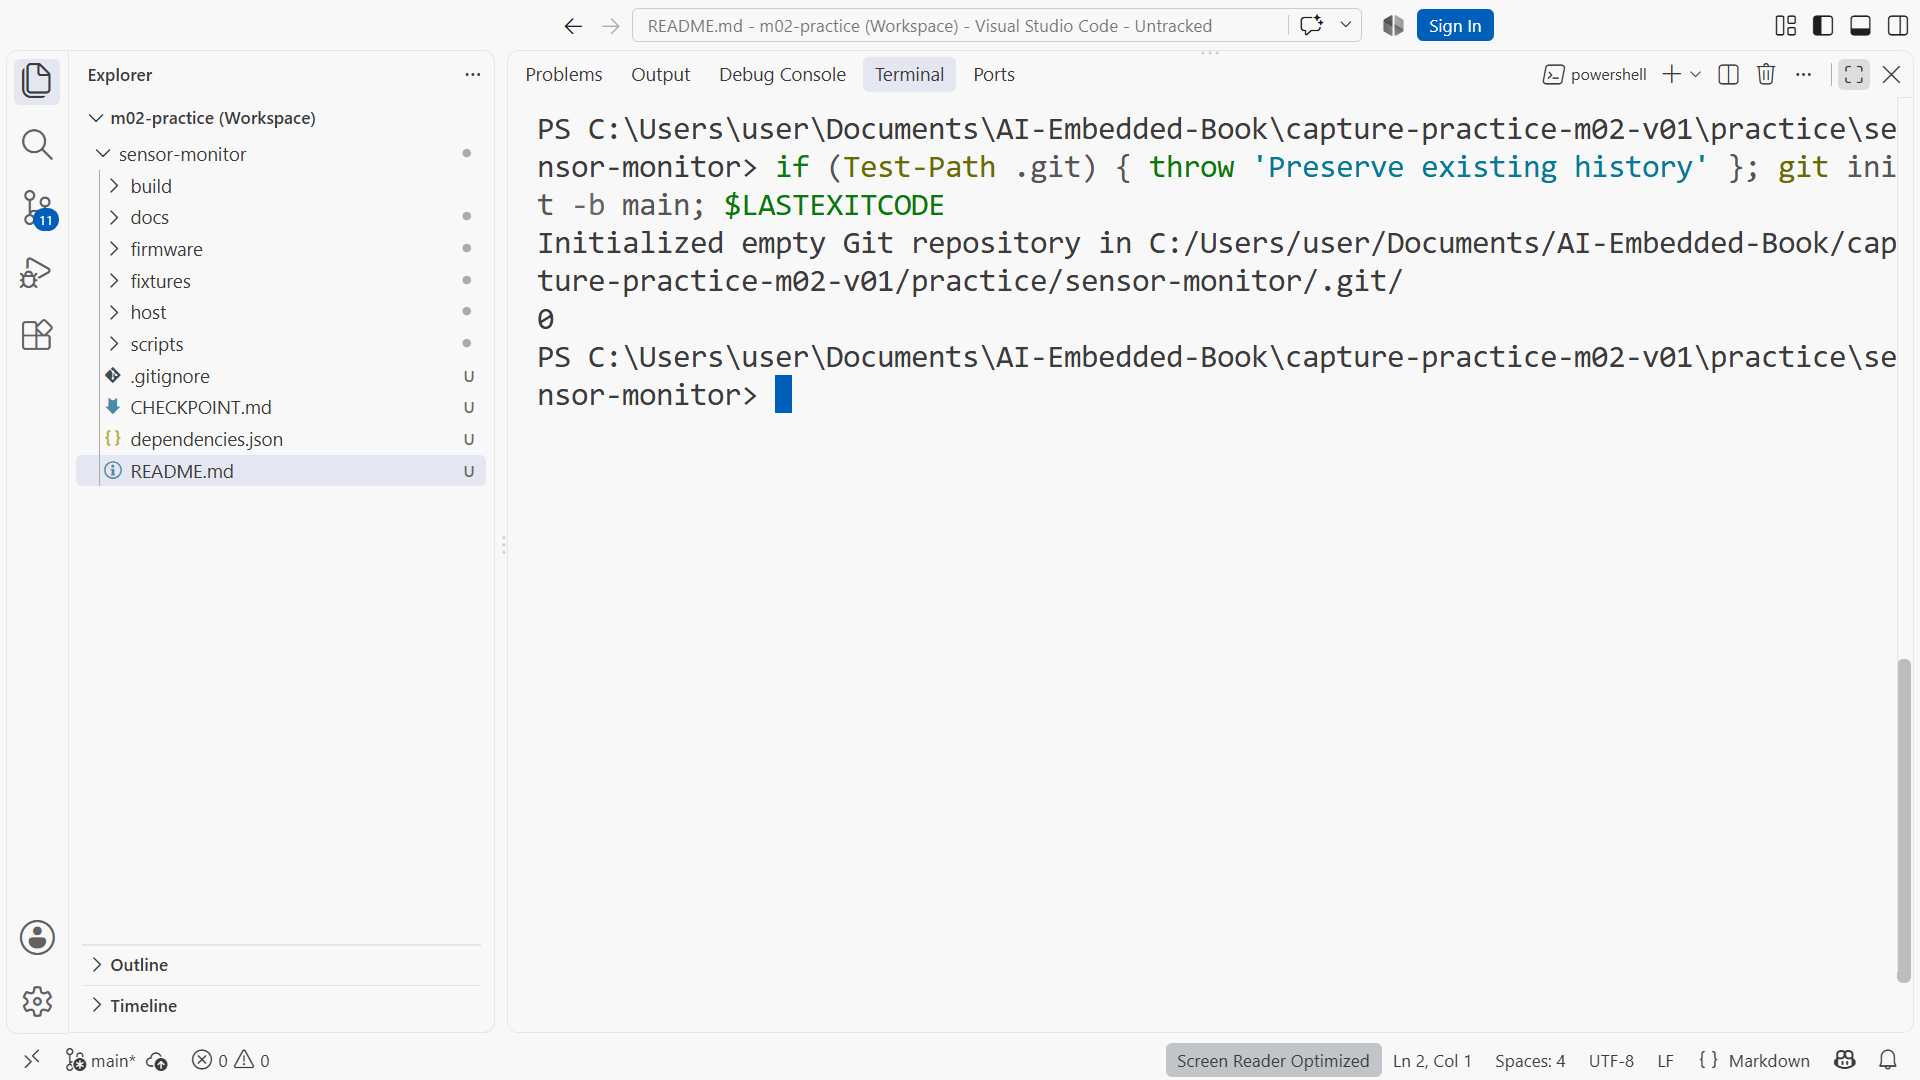
Prepare the Chapter 5 baseline in a separate CP01 source-only folder. From its root in PowerShell, run the sequence below, replacing the two identity values with your chosen name and actual verified no-reply address. Inspect each result before the next operation:
Get-Location
git init -b main
git config user.name 'Your chosen author name'
git config user.email 'YOUR-VERIFIED-NOREPLY-ADDRESS'
git status
git add README.md .gitignore dependencies.json firmware host scripts fixtures docs CHECKPOINT.md
git diff --cached
git commit -m 'Record sensor monitor baseline and build instructions'
git status
Review the selected source and run the applicable CP01 replay/build from M02-L02 before the baseline commit. If the bundle already contains history, stop and select the source-only CP01 extraction instead. A clean status is a repository-state observation, not a test result.
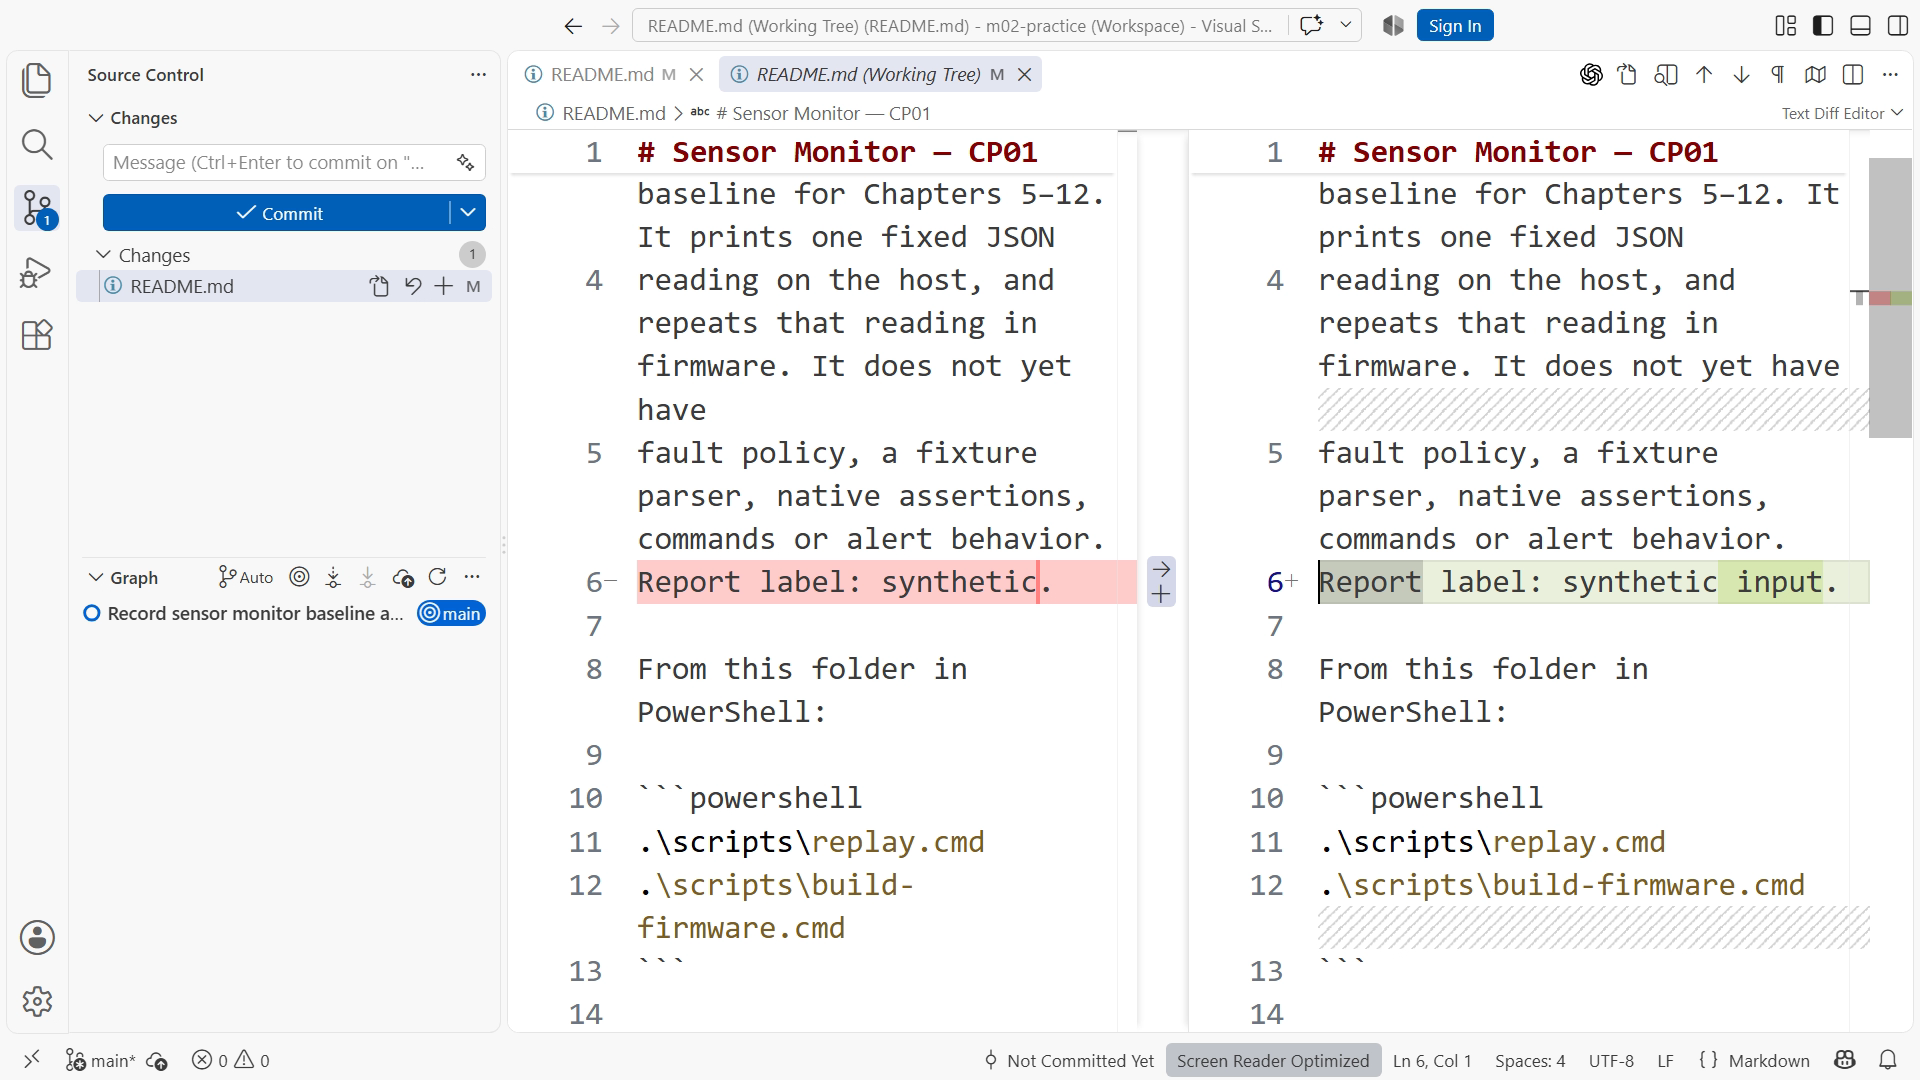
The actual CP01 README contains Report label: synthetic. Change only that line to Report label: synthetic input. in VS Code and save. This clarifies the human-facing label without changing firmware behavior or a machine-readable output format. Inspect Source Control and run:
git status
git diff -- README.md
git diff --cached
Before staging, the README edit should appear in the ordinary diff and the cached comparison should contain no new change. Read the file header, removed line, added line, and surrounding context. Explain the purpose and what remains unchanged because you inspected it.
If the whole file appears replaced, investigate line endings or formatting before accepting it as a one-line task. If another file changed, compare it against the brief. Do not judge a diff by its green color or by an assistant saying it is small; identify the actual behavior each hunk changes.
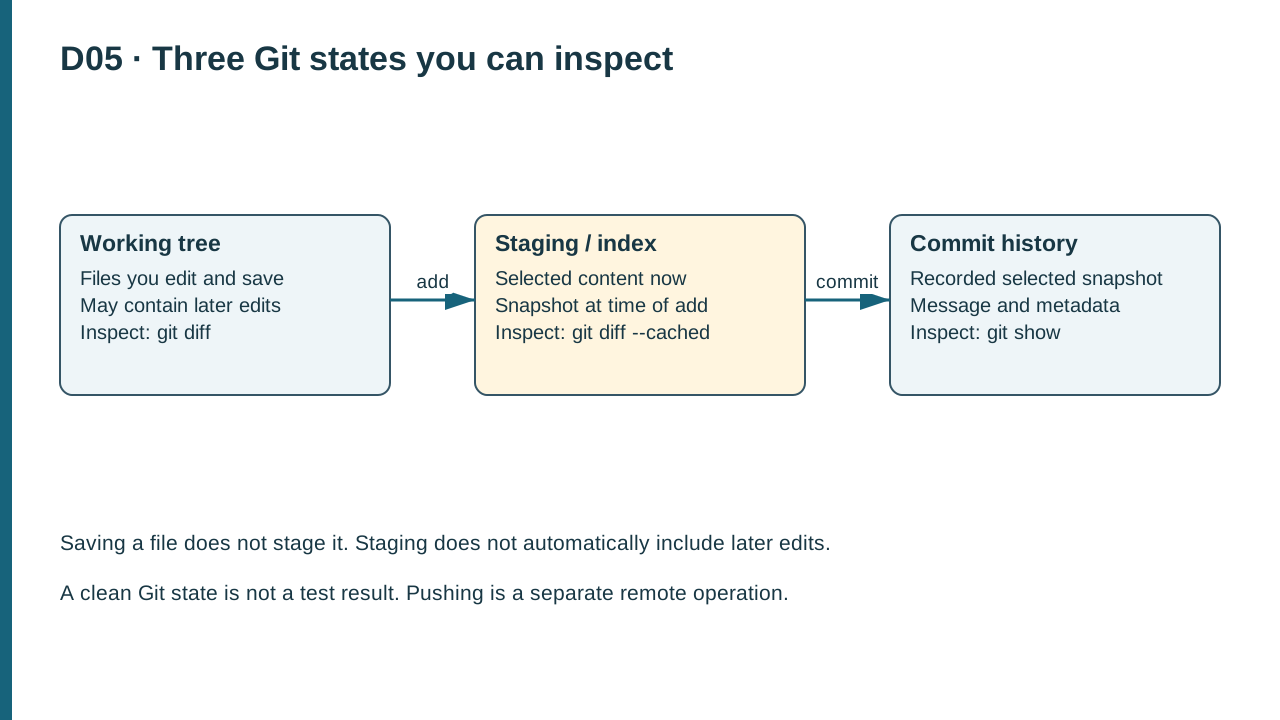
D05. Saving changes the working tree; add selects contents in staging; commit records that selected snapshot. Ordinary and cached diffs compare different states.
Practice and completion
Complete the exercise, then compare your artifact with the separately distributed instructor answer. A lesson acknowledgment records your own progress; it does not certify that a physical test occurred.
Chapter 5. Resources: Project checkpoint guide and toolchain setup. Figure references: SS05-02–03; D05.
Recording transcript
A diff is one of the most useful views you will use with a coding assistant. It lets you inspect what changed instead of relying on a description of the change. In this lesson we will make one small README edit and explain every part of the comparison before staging or committing it. The result should be understandable without reading an old chat.
Start from the CP01 practice folder with its reviewed baseline commit. The written chapter explains how to initialize that source-only folder and record the initial files. Confirm your current location and run Git status. We want a known starting state. If unrelated edits already exist, preserve and account for them rather than quietly treating them as part of this exercise.
The working tree is the content you edit. The staging area is the content selected for the next commit. The commit records a selected snapshot in history. These three places are shown in the conceptual figure. Saving in the editor changes the working file. It does not automatically stage the change or create a commit.
Open the README and locate the exact line, Report label: synthetic. Change it to Report label: synthetic input. This is the designated human-facing label exercise. We are not renaming a JSON field or changing a serial protocol. A small wording improvement is enough to learn the Git mechanics while keeping its purpose visible.
Save the file. Now open the Source Control view in Visual Studio Code and select the changed README. The comparison shows the previous content and new content. Depending on your settings, the editor may place them side by side or inline. The layout can vary, but the underlying question is the same: what content differs between the two selected states?
Look at the removed line and the added line. The minus marker identifies the previous wording. The plus marker identifies the new wording. Those markers are part of the diff display; they are not characters you paste into the README. The surrounding unchanged lines provide context so you can locate the edit in the document.
Explain the change aloud. The file is README dot md. The previous label was synthetic. The new label is synthetic input. The purpose is to make the origin of the demonstration clearer to a reader. Firmware, numeric values, and policy have not been changed by this intended edit. We can make that last statement because we inspect the changed-file list, not because we hope it is true.
Use the terminal for the equivalent inspection. Run Git status, then Git diff with the README path. The ordinary diff compares working content against staging. Because we have not staged the edit, it should appear here. Run Git diff with the cached option as well. If staging still matches the baseline commit, that comparison should be empty.
An empty cached diff does not mean there are no working changes. It means there is no difference in that particular comparison. This distinction becomes important when you edit a file after staging it. One file can then have a selected version in the index and a newer version in the working tree. We will demonstrate that state in the next lesson.
Read the file header as well as the colored lines. If the path is not the README you intended, investigate the project root. If several files appear, ask which part of the task justifies each one. A one-line policy edit can matter more than many lines of harmless documentation, so changed-line count alone is a poor measure of consequence.
Sometimes a diff shows the whole file replaced even though you changed one sentence. That can happen when formatting or line endings changed across the file. Do not simply accept the large comparison because the visible sentence looks right. Identify the cause, preserve useful content, and make the intended small edit reviewable. A clear diff is an aid to reasoning, not just an aesthetic preference.
Now imagine an assistant made the same README improvement and also adjusted a warning threshold. The added word might be correct, but the threshold change belongs to a different decision. The diff helps you separate those ideas. You can accept the useful documentation while rejecting the unrelated behavior change. Later we will practice that review explicitly on a branch.
Verification should match the claim. For this README line, inspect the wording and confirm it still identifies synthetic input. No new unit test is necessary just to prove that a word was added. If source or build commands changed, run the appropriate project checks. Do not imply a program was tested merely because the editor shows a clean comparison or the assistant says the edit is complete.
For your exercise, submit the actual diff and a four-sentence explanation. Name the file, old content, new content and purpose, and the scope outside the change. Confirm that the cached comparison is empty before staging. If your state differs, explain it and correct the starting point rather than copying the expected result into your record.
Read the diff in the direction of the proposed change. Ask what a reader would see before and after applying it. Then check whether the brief wanted that difference. This habit avoids a common review mistake: approving text because each line looks reasonable in isolation, without noticing that the change removes an important condition. Here the extra word clarifies origin. In a later requirement edit, a removed word such as invalid could alter the meaning much more substantially.
Keep the file uncommitted at the end of this exercise so the next lesson can show staging and committing the same change. You are ready to advance when you can say exactly what the diff compares and why the changed line belongs in the task. That small habit scales from a README sentence to a policy correction that affects a boundary case.
Download transcript